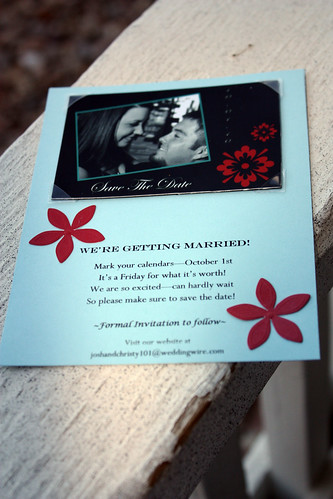
With the help from my mom, we got all the materials to complete this project gathered pretty quickly, and I just sat down one day and assembled them. They came together really fast once the magnets were printed and cut and once we figured out how to format my cards on Publisher. I feel like what we came up with is incredibly true to the theme of our wedding and of my own personal style. This, my friends...is how it's done!
Let me just start by saying tha during the last few months, whenever I would see something I could use and it was cheap or on sale, I would buy it. This meant I have kind of a wedding hoard going on right now...lots of materials just waiting to be busted open and used. Anything I don't end up using can be returned, or handed on to another bride after this process is over. Anyway, here is a break down of the materials I bought:
Materials:
*Ivory invitation envelopes 4 3/8 in. x 5 ¾ in. Box of 100, bought at Office Depot for $10.50*Aqua Blue cardstock, pack of 250, bought at Office Depot for $12.00
* “Bride’s” Floral Table Confetti in a bucket, bought at Michael’s for $4.99
*Elmer’s Glue-All Dual Tip Pen, bought at Michael’s for $1.99
*Pioneer Clear Photo Corners, box of 250, bought at Michael’s for $2.99
*Photo Magnets, printed and assembled at my local portrait studio for $50.00
*Postage, $22. (I used Forever Stamps.)
Instructions:
*The very first thing we did was formatted our backing card on Microsoft Publisher. We went through several different layouts, fonts and looks and ruined more than one piece of paper trying to print them correctly. In the end we went with a really cute poem my mom wrote for us:* I cut my cardstock using my Cricut paper trimmer to 4.25 x 5.5 inches so that my cards would fit nicely in my envelopes.
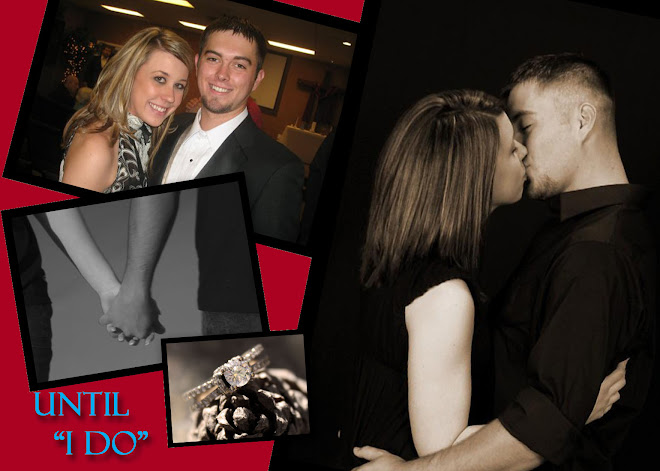
* I designed my magnet design in Adobe Photoshop using one of our engagement photos. Once this was done, I saved it to my SD card and took it to the photo studio to print and assemble 50 magnets.
* I took my completed magnets and put the photo corners on them before sticking the whole thing to the cardstock. I just eyeballed the placement and then pressed down on each photo corner to ensure that it was stuck on.
* Using my Elmer’s glue pen, I carefully and painstakingly painted glue on each petal of my floral confetti, and then I placed the flowers around the words on the card. I did glue my fingers together multiple times, but despite being a pain in the butt, this part only took me like an hour.
* Lastly, I addressed my envelopes with brown and blue felt tip pens that I already owned, stuck a stamp on and put them in the mail.
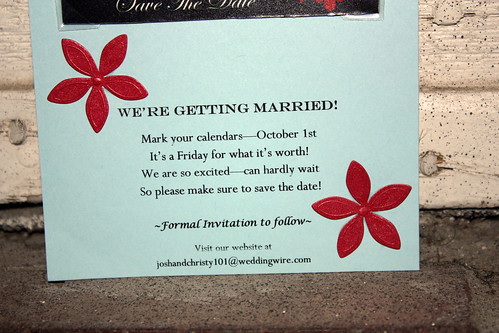
(Here is a close-up of the cute poem and embellishments.)
Actual Cost:
* Envelopes - I used 50 of them: $5.49* Cardstock – I only used about 50 sheets, counting mistakes: $2.00
(I plan on using the remainder of this cardstock for other projects i.e.: place cards and I will calculate that cost when I use some more)
* Floral Confetti – I did not come close to using the whole bucket, but for the sake of being easy, I’ll calculate the whole thing: $4.99
*Glue Pen - $1.99
*Photo Corners - $2.99
*Magnets - $50.00
*Postage - $22.00
Grand Total: $89.46…I’m going to round up to $90.00
$90.00 divided by 50 Save the Dates = $1.80 each.
Considering that these are custom, that price cannot be beat. I am extremely happy because just doing some research online, Save the Dates ordered from catalogs etc, run approximately $3.00 each. I definitely am happy with the bargains we found and the fact that my Save the Dates are 100% unique. Remember Brides: just because something is labeled in a certain way does not mean you cannot use it for other things! I used table confetti to embellish my Save the Dates for MUCH cheaper than I could have found, say, scrapbooking embellishments. Be creative!


No comments:
Post a Comment